Slicing fish for sushi might seem like a daunting task, but we’re here to show you it’s not as complicated as it appears. With the right technique and a bit of practice, anyone can master the art of preparing fish that’s just perfect for sushi. It’s all about understanding the texture, the grain, and the subtle art of the slice.
We’ve all been there, standing in the kitchen, a beautiful piece of fish in front of us, unsure of where to start. But worry not! We’re going to walk you through the process step-by-step, ensuring you get those clean, appetizing slices that’ll make your homemade sushi look and taste as if it’s straight out of a Japanese restaurant. Let’s dive in and demystify the process together, shall we?
Essential Tools for Slicing Fish for Sushi
To achieve those clean, appetizing slices for homemade sushi, certain essential tools are indispensable. Let’s dive into what you’ll need to get started.
The Right Knife
Selecting the correct knife is paramount for slicing fish for sushi. The ideal choice is a sashimi knife, specifically designed for this purpose. Known as Yanagiba in Japan, these knives feature a long, thin blade that ensures precision and smooth cuts without tearing the fish. Yanagiba knives come in various sizes, but a blade length of 240mm to 300mm is commonly preferred for optimal control and efficiency. The sharpness of the blade and its ability to maintain an edge guarantees slices that not only look professional but also preserve the texture and integrity of the fish.
Sharpening Stone
Maintaining the sharpness of your sashimi knife is critical, and for this purpose, a Sharpening Stone is essential. A high-quality whetstone with a grit range between 1000 to 3000 provides the perfect surface for honing the blades of sashimi knives. It’s essential to soak the stone in water for about 10 to 15 minutes before use, ensuring it’s thoroughly saturated. The process of sharpening involves sliding the knife blade at an angle across the wet surface calmly and consistently, ensuring an even sharpening that extends the life of the blade and enhances cutting precision. Incorporating regular sharpening sessions into your sushi preparation routine will keep your knife in top condition, ready to slice fish flawlessly every time.
Preparing the Fish
Before we transform your fresh catch into delectable sushi pieces, let’s prepare the fish properly. This step is crucial for ensuring the fish’s flavor and texture align with sushi quality standards.
Selecting the Right Type of Fish
Picking the suitable species reigns supreme in the quest for sushi excellence. Opt for fatty fish like salmon or tuna for their rich texture and seamless integration into sushi dishes. These species not only provide a delightful taste but also a visually appealing appearance in sushi presentations. When possible, select fish marked with a “sashimi-grade” label to ensure they meet the safety standards for raw consumption.
Cleaning and Filleting
Once the ideal fish selection is made, the next step involves meticulous cleaning and filleting. Begin by rinsing the fish in cold water to remove any scales and impurities from the surface. Using a sharp fillet knife, make a cut along the backbone, separating the fillet from the ribs while leaving the skin intact. This technique enables smooth removal of the fillet in one piece, preserving its integrity for sushi slicing.
Skin Removal Techniques
Removing the skin is a delicate task that requires precision. Employ the use of a flexible knife, like a fillet knife, positioning it between the skin and the flesh. Angle the blade slightly downwards, holding the skin firmly with your other hand. Gently glide the knife along the length of the fillet, pulling on the skin as you go. A proper technique here ensures the fish maintains its shape and texture, ready for perfect sushi slices.
How to Slice Fish for Sushi
After preparing the fish, we’re now ready to slice it for various types of sushi. Each form demands a unique approach to slicing that affects the texture and taste experience of the sushi. Let’s dive into the techniques for cutting fish for sashimi, nigiri, and maki rolls.
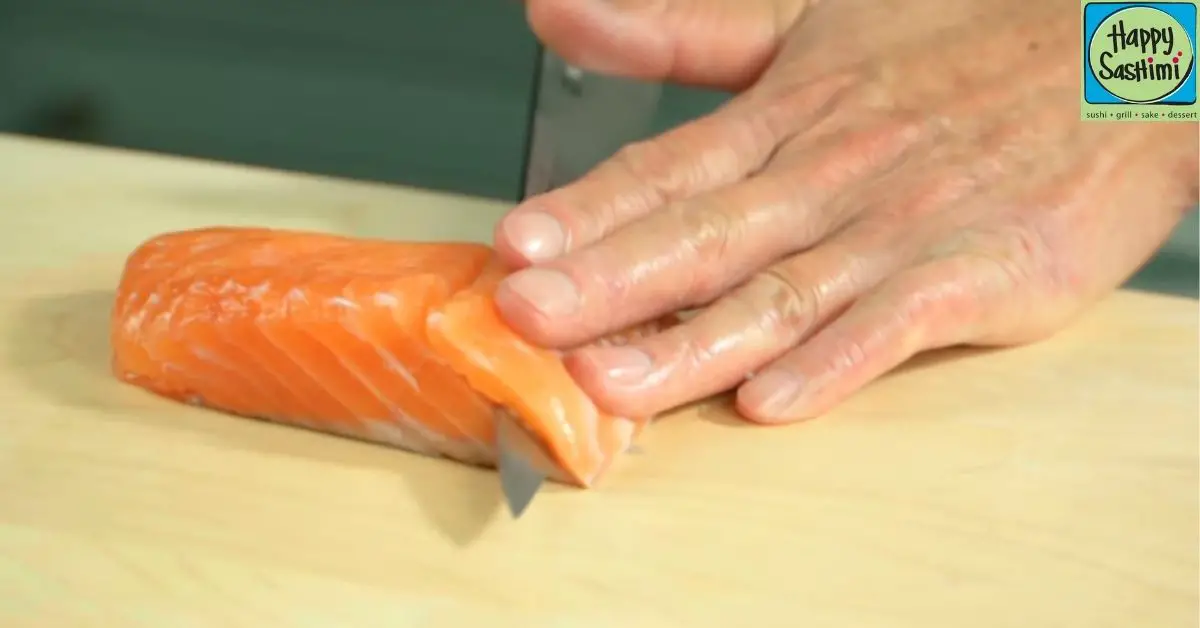
Slicing Sashimi
Slicing sashimi requires precision to enhance its flavor and visual appeal.
- Position the Fish: Lay the fish fillet flat on the cutting board.
- Angle the Knife: Hold the Yanagiba knife at a consistent 45-degree angle relative to the fillet. This angle ensures thin, uniform slices.
- Slice in One Motion: Gently pull the knife towards you, cutting the fish in one smooth motion. This technique prevents tearing, preserving the fish’s texture.
- Thickness: Aim for slices about 1/8 inch thick, though adjust based on the fish type. Fatty fish like tuna can be slightly thicker to appreciate its texture.
Slicing Fish for Nigiri
Slicing fish for nigiri involves a slightly different technique to create the perfect topping for the vinegared rice.
- Cut Against the Grain: Identify the grain of the fish fillet and slice perpendicular to it. This cut makes the fish more tender.
- Slice Thickness: Cut thicker than sashimi, typically between 1/4 inch to 1/3 inch. This thickness ensures the slice holds up well atop the rice.
- Length: Nigiri slices are usually about 2 inches long and 1 inch wide, fitting perfectly on a small ball of rice.
- Smooth Cuts: Use a single, fluid motion to avoid jagged edges that could affect the mouthfeel.
Slicing Fish for Maki Rolls
For maki rolls, the focus is on achieving the right size and texture to complement the roll’s other ingredients.
- Slice Lengthwise: Cut the fillet lengthwise to create long, narrow strips that can span the length of the roll.
- Thickness: Strips should be about 1/4 inch thick, ensuring they can be rolled easily without breaking.
- Even Strips: Ensure each piece is uniformly cut for consistent roll sizes. Uneven pieces can make rolling and presentation challenging.
- Flexible Sizing: Adjust the dimensions based on roll thickness. Thicker rolls like Futomaki require wider strips, while thin rolls like Hosomaki need slimmer pieces.
By mastering these slicing techniques, we ensure each piece of sushi not only looks appetizing but also delivers the distinct textures and flavors characteristic of high-quality sushi.
Tips for Perfect Sushi Slices
Achieving perfect sushi slices hinges on precision and the right approach. Below, we provide targeted tips to ensure your sushi slicing skills are top-notch.
Maintaining Knife Sharpness
Ensuring your knife remains sharp is crucial for clean and effortless cuts. A dull knife can damage the fish’s texture, making precise slices challenging to achieve. Use a whetstone for regular sharpening, focusing on maintaining a consistent angle to keep the blade’s edge sharp. Test the knife’s sharpness by slicing through paper; if the knife cuts smoothly without tearing, it’s ready for slicing fish.
Handling the Fish with Care
Gentle handling of the fish preserves its integrity and appearance. Use a delicate touch when holding and slicing the fish to prevent any unnecessary bruising or tearing of the delicate flesh. We recommend chilling the fish slightly before slicing to firm up the flesh, making it easier to handle and cut. This approach ensures each piece retains its shape and texture, contributing to the overall quality of the sushi.
Storing the Fish Properly Before Slicing
Proper storage before slicing is key to the fish’s freshness and flavor. Store the fish in the coldest part of the refrigerator, ideally on ice, to slow down the bacterial growth without freezing the flesh. Wrap the fish carefully in plastic wrap or place it in an airtight container to avoid exposure to air, which can degrade the quality. Ensuring the fish is fresh and properly stored is instrumental in achieving the best taste and texture in your sushi slices.
Troubleshooting Common Slicing Issues
Slicing fish for sushi is an art form that requires practice and patience. Here, we tackle some common issues that might arise and how to overcome them.
Dealing with Shredded Edges
Achieve clean, sharp cuts by honing the knife before each use. A dull blade can cause the fish to tear, resulting in shredded edges. Utilize a whetstone for sharpening your knife to ensure it glides through the fish without resistance. Additionally, make sure to slice in a single, confident motion rather than sawing back and forth, as this can also prevent the edges from fraying.
Cutting Thin Slices for Sashimi
Freeze the fish slightly to firm it up. Thin slices, critical for sashimi, can be challenging to achieve with fish at room temperature. Place the fish in the freezer for about 20 to 30 minutes before slicing. This slight firmness makes it easier to cut thinner slices without the fish falling apart. Always use a long, sharp sashimi knife and cut slices with a single, smooth motion.
Fish Falling Apart During Slicing
Ensure the fish is properly skinned and boned before slicing. Fish falling apart during slicing is often due to incomplete preparation. Double-check to remove all bones and skin thoroughly, as these can cause the fish to separate when cut. When slicing, use a gentle touch and support the piece of fish with your free hand, applying minimal pressure. Keep your blade wet by dipping it in water mixed with a bit of rice vinegar to prevent sticking and to facilitate a smoother cut.
Conclusion
We’ve journeyed through the delicate art of slicing fish for sushi, from selecting the right tools to mastering precise cuts. By now, we hope you’re feeling confident about tackling sashimi, nigiri, and maki rolls in your own kitchen. Remember, practice makes perfect. Don’t be discouraged by initial hiccups; those clean, thin slices will soon be within your reach. Keep honing your knife and your skills, and before you know it, you’ll be serving up sushi that rivals your favorite restaurant’s. Here’s to many delightful sushi-making adventures ahead!
Related Posts:
- Healthy and Delicious: Your Guide to Low Sodium Sushi Options
- Mastering Sushi: How to Slice Fish Perfectly for Sashimi, Nigiri, & Maki
- Ultimate Crab Salad for Sushi: Enhance Your Homemade Rolls