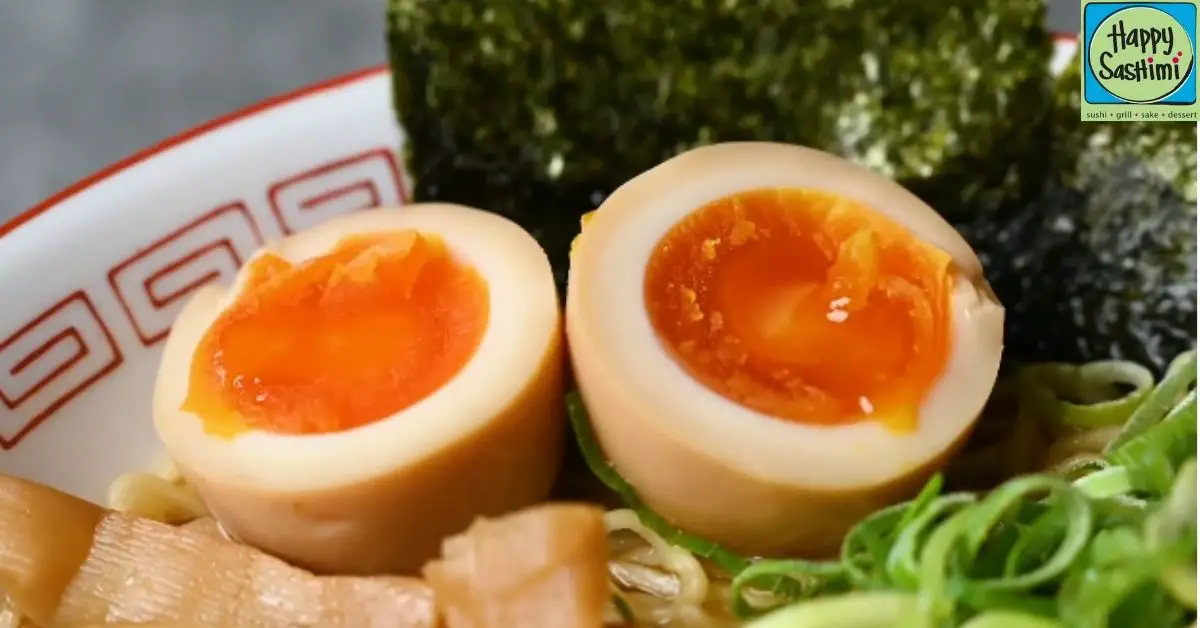
We’ve all had that moment at our favorite ramen spot, diving into a bowl of steaming noodles and broth, only to be stopped in our tracks by a perfectly cooked, marinated egg. That, my friends, is the magic of Nitamago. These flavorful, soft-boiled eggs steeped in a savory marinade are a cornerstone of Japanese cuisine, elevating simple dishes to extraordinary experiences.
Today, we’re thrilled to share our take on the beloved Nitamago recipe. It’s easier than you might think to bring this culinary delight into your kitchen. With just a few ingredients and some patience, you’ll be ready to add a touch of umami to your meals that’ll impress even the most discerning palates. Let’s embark on this delicious journey together, transforming humble eggs into something truly special.
Ingredients for Nitamago
Excited to transform ordinary eggs into a delectable Japanese delicacy? Here’s everything you’ll need to make your own nitamago at home.
Eggs and Marinade Ingredients
To make nitamago, you’ll start with the basics and then immerse them in a flavorful marinade. Here’s what you’ll need:
- 4 large eggs, as fresh as possible
- 1/2 cup of soy sauce
- 1/4 cup of mirin (sweet rice wine)
- 1/4 cup of water
- 2 tablespoons of sake
- 1 tablespoon of sugar
Optional Additions
For those looking to experiment or add an extra layer of flavor to their nitamago, consider these optional ingredients:
- 1 clove of garlic, minced
- 1 slice of ginger, about an inch thick
- 1 green onion, finely chopped
- 1/2 teaspoon of chili flakes (for a bit of heat)
- 1 teaspoon of sesame oil (for a nutty essence)
Feel free to play around with these additions based on your personal taste preferences or what’s available in your pantry. Remember, the goal is to enhance the umami flavor that makes nitamago such a special component in dishes.
Required Tools and Equipment
To ensure your journey into creating Nitamago is as smooth and successful as possible, gathering the right tools and equipment is as crucial as the ingredients themselves. Here’s what you’ll need:
- Medium-Sized Saucepan: Essential for boiling the eggs to that perfect soft-boiled consistency. Look for one with a lid to manage the boiling process effectively.
- Slotted Spoon: This tool is indispensable for carefully removing the eggs from the boiling water and then placing them into the ice bath. It ensures you can handle the eggs safely without burning your fingers.
- Mixing Bowl: A medium-sized mixing bowl is perfect for creating the marinade. This bowl should be large enough to comfortably whisk together the marinade ingredients and subsequently hold the eggs for marination.
- Whisk: For thoroughly combining the marinade ingredients to ensure a consistent and flavorful mixture. A small to medium-sized whisk will do just fine.
- Measuring Cups and Spoons: Precision is key when it comes to the marinade. Use measuring cups and spoons to accurately measure liquid ingredients like soy sauce and mirin, as well as any dry seasonings you decide to include.
- Ziplock Bag or Airtight Container: After mixing your marinade and preparing your eggs, you’ll need a Ziplock bag or an airtight container to marinate the eggs. This container should be large enough to comfortably hold all your eggs while ensuring they are completely submerged in the marinade.
- Ice Bath Setup: Prepare a large bowl with ice and water. This is crucial for stopping the cooking process immediately after the eggs come out of the boiling water, ensuring that soft, runny yolk that’s key to a perfect Nitamago.
By having these tools and equipment ready before you start, you’ll find the Nitamago-making process to be a breeze. Each tool plays its part in ensuring that you achieve that delicious balance of flavors and textures that make Nitamago a standout addition to any meal.
Preparing the Eggs
With our kitchen tools ready, let’s move on to the central part of making Nitamago – preparing the eggs. Proper preparation ensures that the eggs are perfectly soft-boiled and ready to absorb the delicious marinade.
Soft-Boiling the Eggs
- Bring water to a boil: In a medium-sized saucepan, add enough water to cover the eggs completely. Heat over medium-high until the water reaches a rolling boil.
- Lower the eggs carefully: Reduce the heat to medium. Using a slotted spoon, gently lower the eggs into the boiling water. This method helps prevent the eggs from cracking upon contact with the hot water.
- Set the timer: For soft-boiled eggs with a slightly runny yolk, which is ideal for Nitamago, cook them for exactly 6 minutes. Adjust the cooking time if you prefer a firmer yolk.
- Maintain a gentle boil: Keep an eye on the water temperature. It should be at a gentle boil throughout the cooking time. If the boil becomes too vigorous, reduce the heat slightly.
- Prepare an ice bath: While the eggs are cooking, fill a mixing bowl with ice and cold water. This ice bath will stop the cooking process immediately, preserving the soft texture of the yolk.
- Transfer eggs to the ice bath: As soon as the timer goes off, use the slotted spoon to quickly move the eggs from the hot water to the ice bath. Let them sit in the cold water for at least 5 minutes to cool completely.
- Peel the eggs gently: Tap each egg lightly on the countertop to crack the shell all around. Starting at the wider end, where there’s usually an air pocket, gently peel the shell off. Cold water can be used to rinse off any shell fragments clinging to the egg.
- Proceed while eggs are fresh: For the best absorption of the marinade, it’s ideal to marinate the eggs soon after they are peeled while they are still fresh and slightly porous.
By carefully following these steps, we’re ensuring that our eggs are perfectly cooked and ready for the flavorful adventure of marinating. Next, we will dive into the art of marinating these delicate eggs to achieve that signature Nitamago taste.
Preparing the Marinade
With our eggs now perfectly soft-boiled and cooled, it’s time to turn our attention to the marinade. This deeply flavorful liquid is the secret to transforming ordinary boiled eggs into the delectable Nitamago, brimming with umami and a hint of sweetness.
Mixing Ingredients
To start, gather the following ingredients for your marinade:
- 1/2 cup soy sauce
- 1/2 cup mirin (a sweet Japanese cooking wine)
- 1 cup water
- 2 tablespoons sake (optional but recommended for added depth)
- 1 tablespoon sugar
- 2 cloves of garlic, lightly crushed (optional for extra flavor)
- 1 small piece of ginger, sliced (optional for a spicier kick)
In a mixing bowl, whisk together the soy sauce, mirin, water, and sake if you’re using it. Add the sugar and stir until it’s completely dissolved. For those who enjoy a more complex flavor profile, adding garlic and ginger at this stage infuses the marinade with warmth and a subtle spice that complements the eggs beautifully.
After mixing, transfer the marinade into a Ziplock bag or an airtight container. This method ensures that the eggs will be evenly coated and allows the flavors to meld together more effectively than in a traditional bowl.
Taste Adjustments
Taste your marinade before adding the eggs. It should have a balanced flavor, where the savory soy sauce and the sweetness of the mirin highlight each other, without one overpowering the other. If your marinade feels too salty, you can add a bit more water or mirin to mellow it out. Conversely, if it’s too sweet for your liking, a splash more soy sauce can bring the flavors back into balance.
Remember, the eggs will absorb a significant amount of this marinade, so it’s important to adjust these flavors to your preference at this stage. Once you’re happy with the taste, gently place your peeled eggs into the marinade. Seal the bag or container and let the flavors infuse the eggs for at least 12 hours in the refrigerator, though we find that 24 hours yields an even more flavorful result. Rotate the eggs halfway through marinating to ensure even flavor absorption.
By mastering the balance and richness of your marinade, you’re well on your way to creating a delicious batch of Nitamago that can elevate any meal with its subtle complexity and depth.
Marinating the Eggs
Now that our flavorful marinade is crafted to perfection, it’s time to introduce our tender soft-boiled eggs to this umami-packed pool. This step is crucial in transforming boiled eggs into the savory delight known as Nitamago.
Submerging the Eggs
Gently peel your soft-boiled eggs, ensuring to keep them intact. In a container suitable for marination, place the eggs carefully. Pour the marinade over the eggs, making sure they are completely submerged. If the eggs float or aren’t fully covered, a small plate or weight can be used to keep them submerged. This ensures that each egg is evenly seasoned, absorbing the rich flavors we’ve so carefully balanced in our marinade.
Marination Time
The length of time you marinate the eggs is key to achieving the perfect Nitamago. For a delicate balance of flavors, we recommend marinating the eggs for at least 12 hours, but not more than 24 hours. Marinating for 12 hours will infuse the eggs with a subtle, yet distinct, depth of flavor. If left for longer than 24 hours, the eggs could become overly salty and the texture might start to firm up too much, losing that desirable soft and creamy center.
Checking the eggs halfway through the marination process allows us to ensure that they are marinating evenly. If needed, gently turn the eggs to expose them uniformly to the marinade. Remember, patience is a virtue here, and taking the time to marinate the eggs correctly will elevate your Nitamago, making it a show-stopper in any dish it accompanies.
Serving Suggestions
Once our Nitamago has achieved that perfect balance of flavors, having marinated to umami perfection, we’re excited to share some delightful ways to serve these savory gems. Nitamago isn’t just a side dish; it’s a versatile ingredient that can elevate a wide array of dishes with its rich, seasoned profile.
- Ramen’s Best Friend: This is probably the most iconic pairing. Slice the Nitamago in half and gently place atop a steaming bowl of ramen. The creamy yolk and savory flavors of the egg complement the broth beautifully.
- Rice Bowl Upgrade: Simply placing a whole or halved Nitamago over a bowl of steamed rice can transform a humble meal into something special. The egg’s flavors seep into the rice, providing a delicious umami experience.
- Salad Enhancer: Slice the Nitamago and toss them into your favorite salad. They pair exceptionally well with greens, adding a burst of flavor and making the salad more satisfying.
- Sandwich Filler: For a Japanese twist on a Western classic, add sliced Nitamago to sandwiches. Especially delicious with chicken or turkey sandwiches, they add a rich, moist element that contrasts beautifully with crisp lettuce.
- Bento Box Star: Nitamago shines in bento boxes, offering a protein-packed component that’s both flavorful and visually appealing. Pair it with some pickled vegetables and rice for a balanced meal.
Remember, the key is to allow the Nitamago to shine and complement the other components of your dish. Their unique taste and texture can bring a simple dish to life, offering a blend of flavors that are at once familiar and excitingly different. Whether nestled in a bowl of ramen or adding a punch of flavor to your salads, these marinated eggs promise to make every meal a little more special.
Making Ahead and Storage
Preparing Nitamago in advance and storing it properly ensures you can enjoy this delicious addition to your meals anytime. Let’s explore the best practices.
Refrigeration Guidelines
After the eggs have marinated for at least 2 hours, it’s essential to store them correctly for optimal preservation. Here’s how we do it:
- Remove the eggs from the marinade. This prevents them from becoming overly salty or losing their delicate texture.
- Place the Nitamago in an airtight container. If you prefer, you can also wrap them individually in plastic wrap, which helps maintain their shape and moisture.
- Store the Nitamago in the refrigerator. The eggs will keep well for up to 3 days. Remember, fresh is best, so we recommend enjoying them within this timeframe to experience their full flavor and velvety texture.
How to Reheat
Enjoying Nitamago at a slightly warm temperature can enhance its flavors and make it even more comforting. Here’s our simple reheating method:
- Fill a bowl with warm water. The water should be hot to the touch but not boiling, ideally around 60°C (140°F).
- Submerge the Nitamago in the warm water. If they were stored in the fridge, leave them in the water for about 2 minutes. This gently warms them through without cooking them further.
- Remove the eggs from the water and gently dry them with a paper towel.
Whether served with your favorite ramen or as a snack, Nitamago prepared and reheated this way promises to be a delightful treat.
Conclusion
We’ve walked through the delightful journey of making Nitamago, showcasing its simplicity and the profound impact it can have on elevating our meals. With the right balance in the marinade and a careful eye on the cooking time, we’re equipped to bring a touch of Japanese culinary excellence into our kitchens. Whether we’re looking to add a savory pop to our ramen or bring a unique twist to our lunchboxes, Nitamago stands ready to transform the ordinary into extraordinary. Let’s embrace the versatility and flavor of this marinated marvel, experimenting with different dishes and discovering new favorites along the way. Here’s to many more meals brightened by the subtle complexity of Nitamago!
Related Posts:
- Healthy Banana Split Overnight Oats: Customize Your Morning Bliss
- Easy Zucchini Scallion Pancakes Recipe: Tips & Serving Ideas
- Easy Creamy Dijon Penne with Kielbasa Recipe: A Flavorful Feast
- Easy Strawberry Preserves Recipe: From Cooking to Serving
- Ultimate Guide to Smoky Confit Beans: Preparation & Storage Tips
- Ultimate Nitamago Recipe: Elevate Your Meals with This Japanese Marvel
- Ultimate Beet Tzatziki Recipe: Fresh, Flavorful & Easy to Make
- Ultimate Gnocchi Alla Bava Guide: Cooking, Serving & Storage Tips
- Pirikara Konnyaku: A Spicy Twist to Traditional Japanese Delight
- Easy Uiro Recipe: Make Traditional Japanese Chewy Sweets at Home