Embarking on a culinary adventure, we’re diving into the world of sushi with a twist that’s as bold and dramatic as its namesake. The Godzilla Roll, a modern sushi creation, has captured the hearts of adventurous foodies everywhere. It’s not just a dish; it’s a statement piece on your dining table, combining the delicate art of sushi with explosive flavors and textures.
What sets the Godzilla Roll apart is its unique combination of ingredients and the thrilling presentation that often includes a drizzle of fiery sauce and a sprinkle of crunchy tempura flakes. It’s a fusion that pays homage to traditional Japanese cuisine while embracing the flair of contemporary tastes. Join us as we unravel the secrets to crafting this show-stopping roll, ensuring your next sushi night is nothing short of spectacular.
Ingredients for Godzilla Roll Sushi
Diving into the heart of making the Godzilla Roll Sushi, we’re excited to share the essential ingredients needed to bring this culinary masterpiece to life. Capturing the essence and dynamism of Godzilla in every bite, these ingredients combine traditional sushi elements with a twist of innovation.
Sushi Rice
- 1 cup sushi rice
- 1 1/4 cups water
- 2 tablespoons rice vinegar
- 1 tablespoon sugar
- 1/2 teaspoon salt
Seafood Filling
- 8 ounces tempura shrimp, cooked and sliced lengthwise
- 4 ounces crab meat, shredded
- 1/2 avocado, thinly sliced
- 1/2 cucumber, julienne
- Optional: cream cheese, sliced into strips
- 1/4 cup spicy mayonnaise
- 1/4 cup eel sauce
- 1 tablespoon masago (capelin fish roe)
- 1 tablespoon green onions, finely chopped
- 1 tablespoon sesame seeds
- Tobiko (flying fish roe), for garnish
- Thinly sliced jalapenos, for garnish
With these ingredients ready on your kitchen counter, you’re all set to assemble a Godzilla Roll Sushi that’s as visually striking as it is delicious. The harmonious blend of textures and flavors promises a sushi experience that’s both thrilling and indulgent, perfect for making your sushi night an unforgettable adventure.
Necessary Equipment
To make your own Godzilla Roll at home, a couple of key pieces of equipment are essential to get that perfect sushi shape and clean cut. Let’s dive into what you’ll need.
Sushi Mat
A bamboo sushi mat is indispensable for rolling sushi. Before we start, we’ll need to cover it with plastic wrap. This little hack prevents rice from sticking to the mat and facilitates an easier cleanup process. When it’s time to roll, the sushi mat will help us apply even pressure across the roll, ensuring a compact and neatly shaped sushi roll that holds together when sliced.
Sharp Knife
The importance of a sharp knife cannot be overstated. A dull knife would mangle the roll, making a clean cut impossible. We recommend using a long, sharp chef’s knife or a specialized sushi knife if you have one. Before slicing the Godzilla Roll, we’ll dip the knife in water and gently wipe it with a towel. This preparation prevents the rice from sticking, allowing us to slice through the roll with precision and ease, resulting in those perfect sushi pieces ready for presentation.
Preparing the Sushi Rice
Mastering the sushi rice is a crucial step in achieving the perfect Godzilla Roll. Let’s walk through how to prepare sushi rice that’s sticky, flavorful, and ready to hold all the delicious fillings our Godzilla Roll requires.
Washing the Rice
- Begin with 2 cups of short-grain sushi rice, placing it in a large bowl.
- Fill the bowl with cold water, swish the rice around with your hands, then drain. This process removes excess starch, ensuring the rice doesn’t become too sticky.
- Repeat the washing step 3 to 4 times or until the water runs relatively clear.
- Drain the rice completely using a fine mesh sieve or colander. Let it sit to dry for about 15 minutes. This step is essential to get the right texture.
- Transfer the washed rice into a rice cooker. Add 2 1/2 cups of water or follow the rice cooker instructions for the amount of rice you’re cooking. The precise water-to-rice ratio is vital for achieving the perfect texture.
- After the rice is cooked and while it’s still hot, prepare the seasoning mixture. Combine 1/3 cup of rice vinegar, 2 tablespoons of sugar, and 1 teaspoon of salt in a small saucepan. Heat over low heat just until the sugar and salt dissolve. Do not boil.
- Transfer the hot rice to a large wooden bowl, traditionally called a hangiri, if available. Otherwise, a large wide bowl works just fine. Pour the seasoning mixture evenly over the rice.
- Use a rice paddle or a wide spatula to gently fold the seasoning into the rice. The goal is to coat the rice without smashing the grains. Fan the rice as you mix to help cool it down and give it a glossy finish.
- Once the rice has cooled to room temperature, it’s ready to be used for your Godzilla Rolls. Remember, the rice should be used the same day for the best taste and texture.
With your sushi rice perfectly cooked and seasoned, you’re now ready to assemble the Godzilla Roll, layering in flavors and textures for a truly exciting sushi experience.
Preparing the Seafood Filling
Now that our sushi rice is perfectly seasoned and ready to go, let’s move on to the heart of the Godzilla Roll: the seafood filling. This step is crucial for adding that burst of flavor and texture which makes this sushi roll truly special.
Choosing Your Fish
For the Godzilla Roll, we typically use tempura shrimp and crab meat. However, feel free to get creative with your choices. If you’re using shrimp, we recommend large, fresh shrimp, which we’ll later batter and fry to achieve that perfect tempura crunch. As for the crab meat, imitation crab sticks work wonderfully and are easy to handle, but if you have access to fresh crab, it certainly elevates the dish.
- Shrimp: If opting for tempura shrimp, you’ll need about 4 large shrimp. Peel, devein, and leave the tail on for that classic sushi presentation.
- Crab Meat: Aim for approximately 1/2 cup of shredded crab meat or imitation crab sticks. If using fresh crab, make sure to remove all shell fragments.
Preparing Vegetables
The Godzilla Roll isn’t just about the seafood; it’s also about the crisp, fresh vegetables that add a pop of color and texture. Cucumber and avocado are our go-tos for this.
- Cucumber: Choose a firm, fresh cucumber. Cut off the ends, and slice it into long, thin strips that will fit comfortably inside the roll. We need about 6 strips, each 4 inches long. The crunchiness of the cucumber adds a refreshing contrast to the softness of the rice.
- Avocado: Select a ripe but firm avocado. Cut it in half, remove the pit, and slice each half into thin slices while still in the skin. Carefully scoop out the slices. Avocado adds a creamy, rich texture that balances the flavors of the seafood beautifully.
Preparing the vegetables this way not only enhances the texture and flavor profile of your Godzilla Roll but also ensures every bite is packed with freshness and variety. With the seafood filling ready and the vegetables prepped, we’re one step closer to rolling our delicious Godzilla Sushi Rolls.
Assembling the Godzilla Roll Sushi
Now that we’ve prepared our sushi rice and seafood filling, we’re ready to dive into the exciting part: assembling the Godzilla Roll Sushi. This step transforms our ingredients into the visually stunning and delicious roll that’s bound to impress.
Spreading the Rice
- Place a sheet of nori (seaweed) on your bamboo sushi mat with the shiny side facing down.
- Wet your hands with water to prevent sticking, and then grab about a cup of sushi rice. Spread the rice evenly across the nori, leaving a small margin at the top edge to seal the roll. The layer should be about 1/4 inch thick. A gentle touch is key to avoid crushing the grains.
- Sprinkle sesame seeds or tobiko (flying fish roe) over the rice for an added crunch and flavor.
Adding the Filling
- Lay your prepared fillings—tempura shrimp, thinly sliced cucumber, avocado slices, and crab meat—on the rice-covered nori. Arrange them in a line along the bottom edge of the seaweed, closer to you. Be sure not to overfill to ensure a tight roll.
- Drizzle a small amount of spicy mayo or any other preferred sauce over the fillings for an extra burst of flavor.
- Gently lift the edge of the bamboo mat closest to you, using your fingers to hold the fillings in place.
- Roll it away from you, applying slight pressure to compact the fillings into a cylindrical shape. The key is to roll snugly but not so tight that the fillings are squeezed out.
- Once you’ve rolled the sushi halfway, unfold the mat slightly and continue rolling until the entire sheet is rolled into a tight cylinder.
- Use the mat to shape and firm up the roll by gently pressing and molding.
- With a sharp, wet knife, slice the roll into 6-8 pieces, cleaning the knife between each cut to ensure clean slices.
- Arrange your Godzilla Rolls on a plate, and they are now ready to be garnished and served.
Following these steps, you’ll have created a delectable Godzilla Roll, combining the crunch of tempura with the creamy texture of avocado and the rich flavors of the seafood. Each bite is a delightful journey through textures and tastes, emblematic of the creativity that sushi embodies.
Making the Toppings and Sauce
After assembling your Godzilla Roll, it’s time to add the finishing touches that will elevate it from delicious to extraordinary. We’ll dive into preparing the spicy mayo and creating the crunchy topping that adds texture and a burst of flavor to every bite.
Preparing the Spicy Mayo
The spicy mayo is a key component in creating the Godzilla Roll’s signature kick. Here’s how we do it:
- Ingredients:
- 1/2 cup mayonnaise
- 2 tablespoons sriracha sauce
- 1 tablespoon sesame oil
- 1 teaspoon soy sauce
- Directions:
- In a small bowl, whisk together the mayonnaise and sriracha sauce until completely blended.
- Stir in the sesame oil and soy sauce, mixing until the sauce is smooth and uniform in color.
- Taste and adjust the seasoning, adding more sriracha for extra heat if desired.
- Set aside until ready to use, or store in the refrigerator if making ahead.
This spicy mayo not only adds a creamy, tangy element but also introduces a heat level that you can adjust to suit your preference.
Creating the Crunchy Topping
A signature feature of the Godzilla Roll is its contrasting textures, especially the crunch that surprises with each bite. Here’s how to achieve that:
- Ingredients:
- 1/4 cup panko breadcrumbs
- 1/2 tablespoon sesame seeds
- 1 teaspoon olive oil
- Directions:
- Heat a small pan over medium heat and add the olive oil.
- Once the oil is hot, add the panko breadcrumbs and sesame seeds.
- Stir continuously until the breadcrumbs turn a golden brown and the sesame seeds are toasted, about 3-5 minutes.
- Remove from the heat and let cool on a plate. The mixture will continue to crisp up as it cools.
Sprinkling this crunchy topping over the Godzilla Roll not only adds a delightful texture but also introduces a nutty flavor from the toasted sesame seeds, creating a more complex and satisfying sushi experience.
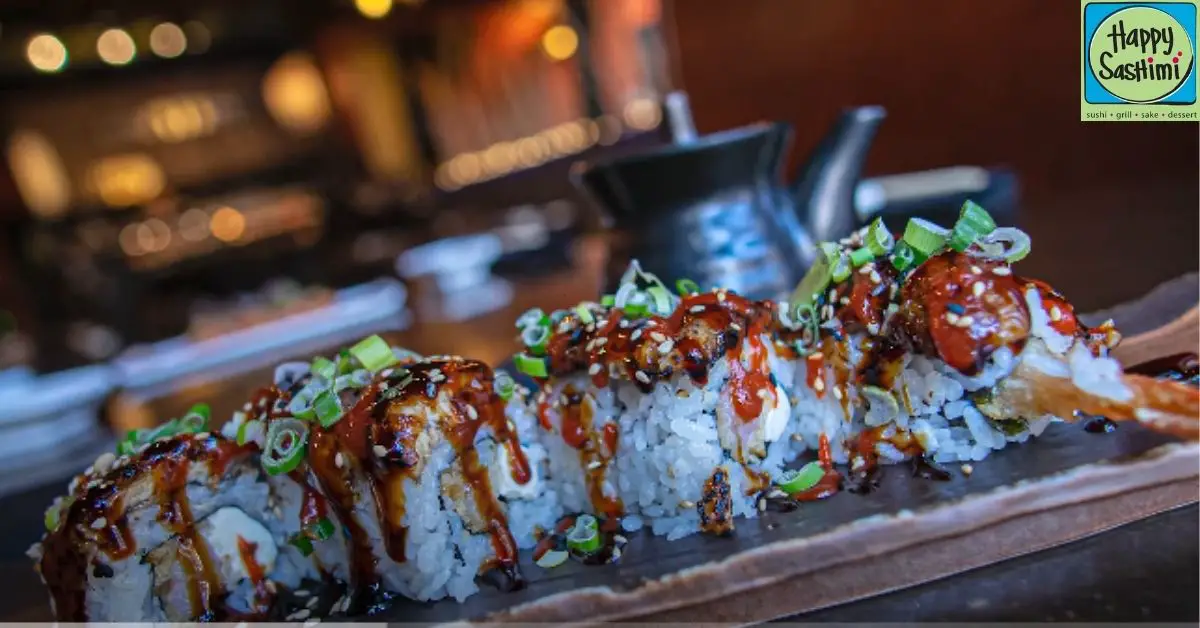
Cutting and Serving
Once you’ve assembled your Godzilla Roll, the next steps are cutting and serving. This final stage is crucial for the aesthetic appeal and the taste experience of the sushi.
How to Cut Sushi Rolls
- Prepare a sharp, non-serrated knife. Dipping the knife in water mixed with a little vinegar can prevent rice from sticking, ensuring cleaner cuts.
- Gently place the sushi roll on a cutting board.
- Slice the roll in half, aiming for the middle to keep the size of each piece uniform.
- Wet the knife again, then cut each half into three or four pieces, depending on your preference. For Godzilla Rolls, slightly larger pieces showcase the variety of fillings beautifully.
- Wipe the knife clean between cuts if rice or fillings begin to stick, re-wetting as necessary to maintain a smooth slicing motion.
- Choose a plate or a platter that complements the visual appeal of Godzilla Rolls. A black or dark-colored dish can make the vibrant colors of the sushi stand out.
- Arrange the cut pieces in a curve or a straight line on the plate. Allow some space between each piece to display the cross-section and fillings attractively.
- Drizzle a small amount of spicy mayo over the sushi rolls for an extra flavor kick and a visually appealing garnish.
- Sprinkle a bit of the crunchy panko topping over the rolls and around the plate for added texture and presentation flair.
- Garnishes such as thinly sliced green onions, sesame seeds, or a few delicate drops of soy sauce can add both flavor and visual interest.
- Serve with a small bowl of soy sauce, a dab of wasabi, and a few slices of pickled ginger on the side of the plate for those who enjoy customizing their sushi experience.
By paying attention to both the cutting and the serving of your Godzilla Roll sushi, you ensure each bite is a delight both visually and tastefully.
Conclusion
We’ve walked you through the journey of making the Godzilla Roll, from gathering your ingredients to the final, satisfying bite. It’s not just about mixing flavors and textures; it’s about creating an experience that delights all the senses. With the right tools and a bit of patience, you’ll find yourself serving up a dish that’s as visually stunning as it is delicious. Remember, the key to a perfect Godzilla Roll lies in the details—sharp cuts, attractive presentation, and the right balance of spicy, crunchy, and umami. So go ahead, give it a try and watch as your kitchen becomes the new favorite sushi spot among your friends and family. Happy rolling!
Related Posts:
- Sunshine Roll Sushi Recipe: A Step-by-Step Guide to Fresh Flavors
- Crafting the Perfect Alaska Roll Sushi: Tips & Techniques
- Master American Dream Roll Sushi: Recipe & Plating Secrets Unveiled
- Ultimate Guide to Making Godzilla Roll Sushi: From Prep to Plate
- Mastering Passion Roll Sushi: Tips for Perfect Rolls Every Time
- Ultimate Guide to Black Dragon Roll Sushi: Ingredients & Serving Tips
- Ultimate Guide to Las Vegas Roll Sushi: Prep, Fry, and Serve Like a Pro
- Lemon Roll Sushi: A Citrus Twist on Traditional Favorites & Storage Tips
- Lobster Roll Sushi: A Fusion Delight with Easy Prep Tips