Diving into the world of sushi, we’ve stumbled upon a gem that’s as dazzling as the city it’s named after: the Las Vegas Roll. This sushi roll takes the traditional Japanese cuisine and gives it a flamboyant twist, embodying the spirit of its namesake city with its bold flavors and extravagant presentation. It’s a culinary adventure, blending the delicate art of sushi with the excitement of Las Vegas.
What sets the Las Vegas Roll apart is its unique combination of ingredients and its preparation method. It’s not just about the fresh fish; it’s the deep-fried goodness and the creamy, spicy sauces that elevate it to a whole new level. We’re excited to share with you how to bring this show-stopping dish to your table. It’s a surefire way to impress your guests and take them on a flavor journey they won’t forget.
Ingredients
Diving into the heart of what makes the Las Vegas Roll truly spectacular, let’s explore the ingredients needed to recreate this sushi delight at home. Remember, the magic is in the mix of flavors and textures.
Sushi Rice
- 2 cups sushi rice
- 2 1/2 cups water, for cooking
- 1/2 cup rice vinegar
- 2 tablespoons sugar
- 1 teaspoon salt
Nori Sheets
- 4 nori sheets, for rolling
Filling Ingredients
- 1/2 lb sushi-grade tuna, diced into small pieces
- 1/2 lb cream cheese, cut into strips
- 1 avocado, sliced
- 1 cucumber, julienned
- 1 cup tempura batter mix (for coating)
- Light oil, for deep frying
- 1/2 cup mayonnaise
- 2 tablespoons Sriracha sauce
- 1 tablespoon soy sauce
- Eel sauce, for drizzling
- 1 tablespoon black sesame seeds, for garnish
Each ingredient has been carefully selected to ensure we capture the essence and excitement of Las Vegas in every bite. Let’s move on to assembling our rolls, where we’ll bring all these components together into something truly extraordinary.
Required Tools and Equipment
After selecting the perfect ingredients to capture the essence and excitement of the Las Vegas Roll, it’s crucial to have the right tools and equipment on hand to bring this delectable sushi creation to life. Here’s a list of the essential tools and equipment you’ll need:
- Bamboo Sushi Rolling Mat: This tool is indispensable for rolling tight, even sushi rolls that hold together beautifully.
- Sharp Chef’s Knife: A sharp knife is essential for slicing your rolls into perfect bite-sized pieces without squishing or tearing them.
- Rice Cooker: Though not strictly necessary, a rice cooker ensures consistently perfectly cooked sushi rice, which is the foundation of any great sushi.
- Mixing Bowl: You’ll need a large mixing bowl for seasoning your sushi rice to perfection.
- Spatula or Rice Paddle: This helps in evenly mixing the rice seasoning without mashing the rice grains.
- Small Bowls: Prepare and organize your fillings in small bowls for efficient assembly of your rolls.
- Cling Film (Plastic Wrap): This helps in keeping the bamboo mat clean and prevents rice from sticking to it, especially when making inside-out rolls.
- Deep Fryer or Heavy Saucepan: For those elements of the Las Vegas Roll that require deep-frying, such as tempura-fried avocado or cream cheese.
- Whisk and Shallow Bowl: Essential for preparing your tempura batter to the right consistency.
- Saucepan: For heating up your eel sauce and soy sauce, enabling them to blend flavors more fully.
- Teaspoon and Tablespoon Measures: For accurately measuring out sauce ingredients to ensure the perfect balance of flavors.
- Cutting Board: Essential for prepping your ingredients, like slicing avocado, cucumber, and cream cheese.
Having these tools and equipment handy will make the process of creating the Las Vegas Roll much smoother and more enjoyable. Let’s move on to preparing our ingredients, ensuring we have everything ready for assembly.
Preparing the Sushi Rice
The foundation of any delicious sushi, including our Las Vegas Roll, is perfectly prepared sushi rice. Let’s walk through the steps to get our sushi rice ready, fluffy, and seasoned just right.
Rinsing the Rice
- Measure 2 cups of sushi rice and pour it into a medium-sized bowl.
- Fill the bowl with cold water. Gently agitate the rice with your hands, then carefully pour out the water. Repeat this process 4-5 times until the water becomes clear. This step removes excess starch from the rice, preventing it from becoming overly sticky.
- After the final rinse, drain the rice well in a fine mesh sieve.
Cooking the Rice
- Transfer the rinsed rice to a rice cooker. Add 2 1/2 cups of water. Secure the lid and start the cooker. If you’re not using a rice cooker, combine the rinsed rice and water in a medium saucepan. Bring to a boil, then cover with a tight-fitting lid and reduce the heat to low. Simmer for 18 minutes.
- Once the rice is cooked, turn off the heat but do not open the lid. Let the rice steam for an additional 10 minutes. This step ensures the rice is fully cooked and fluffy.
- While the rice cooks, prepare the sushi vinegar by mixing 1/4 cup of rice vinegar, 2 tablespoons of sugar, and 1 teaspoon of salt in a small saucepan. Heat over a low flame, stirring until the sugar and salt have dissolved. Remove from heat and let it cool.
- Transfer the cooked rice to a large wooden bowl (preferably a Hangiri if you have one). Pour the cooled sushi vinegar evenly over the rice. Using a spatula, gently fold the vinegar into the rice by slicing the spatula through the rice, lifting and turning it. Avoid mashing the rice.
- As you season the rice, fan it gently with a piece of cardboard or an electric fan. This helps to cool the rice to the proper temperature and gives it a desirable, shiny finish.
- Let the seasoned sushi rice cool to room temperature before using it for your Las Vegas Roll. This step is crucial for achieving the perfect texture and consistency for your sushi.
Preparing the Filling
Now that our sushi rice is ready, let’s focus on the heart of the Las Vegas Roll – its sumptuous filling. We’re going to pair the crispy delight of tempura shrimp with the creamy texture of cream cheese and the rich, buttery flavor of avocado. These fillings are not just tasty but are what give the Las Vegas Roll its signature taste and texture.
Tempura Shrimp Prep
To start, we’ll need:
- 6 large shrimp, peeled and deveined
- 1/2 cup of tempura batter mix
- 3/4 cup ice-cold water
- Vegetable oil for frying
First, let’s make the tempura batter. In a medium bowl, whisk together the tempura batter mix with ice-cold water until it’s just combined. It’s okay if there are lumps – overmixing can make the batter tough.
Next, heat the vegetable oil in a deep fryer or large saucepan to 350°F (175°C). While the oil is heating, pat the shrimp dry with paper towels. This helps the batter stick better. Once the oil is hot, dip each shrimp into the batter to coat it completely, then gently lay it in the hot oil. Fry the shrimp for 2-3 minutes or until they are golden brown and crispy. Remove the shrimp from the oil and place them on a paper towel-lined plate to drain and cool. Once cooled, slice each shrimp lengthwise into two halves to make them the perfect size for your sushi roll.
Cream Cheese and Avocado Prep
For the cream cheese and avocado, you will need:
- 4 ounces of cream cheese, softened
- 1 ripe avocado
Cut the cream cheese into thin strips. It’s easier to do this if the cream cheese has been left out at room temperature for a bit to soften.
Next, slice the avocado in half, remove the pit, and peel off the skin. Slice the avocado into thin strips as well. To prevent the avocado from browning, you can lightly brush the slices with lemon juice. This step not only preserves the color but adds a subtle citrus note that enhances the freshness of the roll.
With the tempura shrimp prepared and the cream cheese and avocado sliced, we’re all set to assemble our Las Vegas Roll. These components, when combined, provide a delightful contrast of textures and flavors that are characteristic of this delicious sushi roll.
Rolling the Las Vegas Roll
Now that we’ve prepared our sushi rice to perfection and cooked up the luscious fillings of tempura shrimp, cream cheese, and avocado, it’s time to bring everything together in the creation of the Las Vegas Roll.
Spread the Rice
Begin by laying a sheet of nori on a bamboo sushi mat. With damp hands, take a ball of your seasoned sushi rice and spread it evenly across the nori, leaving about a half-inch margin at the top for sealing the roll later. Aim for a layer that’s about 1/4 inch thick. Remember, pressure should be gentle to avoid crushing the rice grains, ensuring the roll’s exterior has a pleasing texture.
Place the Fillings
Align your fillings — the crispy tempura shrimp, slices of creamy avocado, and strips of cream cheese — in a neat line along the bottom edge of the rice-covered nori. The contrast of cool, creamy cheese and avocado with the warm, crispy shrimp creates the signature sensory experience of the Las Vegas Roll. Be mindful not to overfill to ensure a tight roll.
Rolling It Up
Now for the magic moment! Tuck the edge of the nori closest to you over the fillings, using your fingers to keep everything tightly packed. Gently pull the edge of the sushi mat up and over, applying even pressure to form the roll. Continue rolling, peeling back the mat as you go, until the roll is complete. Moisten the exposed strip of nori at the top with a little water to seal the roll. Then, with a sharp, wet knife, slice the roll into bite-sized pieces.
By following these steps, we expertly assemble the Las Vegas Roll, ensuring each bite is a harmonious blend of textures and flavors. Ready to serve and enjoy, this roll brings a slice of Las Vegas extravagance right to your table.
Deep Frying the Roll
After mastering the art of assembly, we’re now ready to turn our Las Vegas Roll into a crispy, golden delight. Deep frying adds a tantalizing texture contrast that’s key to the roll’s appeal.
Prepping for Fry
Before we dive into frying, it’s essential to get everything in place. You’ll need:
- A deep fryer or a deep, heavy-bottomed pot
- Enough vegetable oil to fill the pot about halfway (but never more than two-thirds full to prevent spillage)
- A kitchen thermometer to ensure oil is at the correct temperature (about 350°F or 175°C)
- A slotted spoon or frying spider to safely lower and remove the roll from the hot oil
- Paper towels or a cooling rack for draining excess oil
- The assembled, uncut Las Vegas Roll
First, set up your frying station near your cooking area for efficiency and safety. Ensure the oil is heated to 350°F (175°C); this temperature is ideal for achieving that perfect golden brown without overcooking the inside. Have your draining setup ready next to the frying area to transfer the fried roll immediately after cooking.
Deep Frying Process
Once the oil has reached the right temperature, it’s time to fry the Las Vegas Roll. Follow these steps for best results:
- Carefully wrap the entire roll in a light coating of tempura batter. This not only adds to the crunch but also seals in the flavors.
- Gently lower the wrapped roll into the hot oil using a slotted spoon or frying spider. Ensure it’s fully submerged for an even fry.
- Fry the roll for about 2-3 minutes, or until it’s golden brown and crispy. Keep an eye on it to prevent burning.
- Carefully remove the roll from the oil and let it drain on paper towels or a cooling rack. This step removes excess oil for a cleaner taste.
- Allow the roll to cool slightly before cutting it into pieces. This brief resting period lets the roll firm up, making slicing easier and preserving the perfect outer crisp.
By closely following these steps, our Las Vegas Roll will have a delectable crunchy exterior, complimenting the soft, flavorful interior. It’s a sensory delight, blending the creamy, savory filling with an irresistible crunch in every bite.
Assembling the Las Vegas Roll
After preparing the sushi rice and crafting the fillings, we’re now ready to assemble our Las Vegas Roll. This is where the magic happens, transforming simple ingredients into a decadent sushi masterpiece.
Cutting the Roll
Once we have our Las Vegas Roll fried to a perfect golden brown, it’s time to slice it into bite-sized pieces. Here’s how we do it:
- Place the cooled roll on a cutting board. To prevent sticking, we lightly coat the blade of our sharp knife with a bit of water.
- Using a gentle sawing motion, we slice the roll into 8 equal pieces. It’s important to cut through smoothly to ensure the fillings remain intact and the sushi maintains its shape.
- We clean the knife with a damp cloth between slices to ensure each cut is clean and the presentation is impeccable.
Adding Toppings
The final step in creating our Las Vegas Roll is to add the toppings that will elevate its flavor and presentation:
- Drizzle a bit of spicy mayo over the top of the sliced rolls. We make our own spicy mayo by mixing mayonnaise with a dash of hot sauce to get that perfect blend of creamy and spicy.
- Sprinkle a small amount of thinly sliced green onions and a pinch of sesame seeds over the rolls for an added layer of flavor and a pop of color.
- For an extra touch of luxury, we like to place a few thin slices of avocado on top of each piece. The creaminess of the avocado complements the crunch of the tempura beautifully.
- Lastly, we arrange the slices on a plate, making sure each piece is displayed to show off the fillings and toppings. This not only makes our Las Vegas Roll look more appealing but also ensures a harmonious blend of flavors with every bite.
By following these steps, we guarantee a Las Vegas Roll that’s not only visually stunning but also packed with an explosion of flavors and textures. It’s a true testament to the culinary artistry of sushi making.
Serving
Now that we’ve mastered the artistry of making the Las Vegas Roll Sushi, let’s turn our attention to serving this delightful dish. The presentation and the accompanying sauces can elevate the overall dining experience, making it not just a meal, but an event.
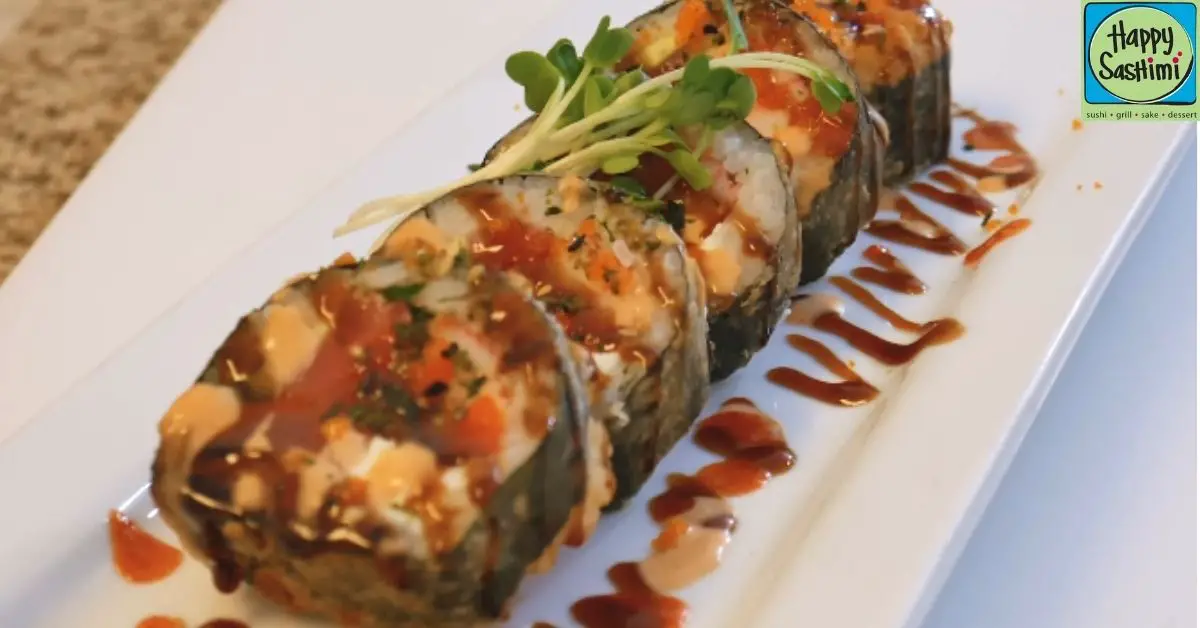
Plating the Las Vegas Roll Sushi
To plate the Las Vegas Roll, we recommend a clean, white dish that allows the colors of the sushi to stand out. Arrange the sliced rolls in a circular pattern, starting from the outer edge of the plate and working your way in. This technique showcases the beautiful cross-section of each piece, making it irresistible to the eye. For a touch of elegance, place a small dollop of spicy mayo on the plate, and using the back of a spoon, drag the sauce across the plate to create a decorative smear. Garnish the plate with thinly sliced green onions and a sprinkle of sesame seeds to add a pop of color and texture. If you’re feeling adventurous, a few thin slices of avocado or a fan of cucumber slices can add freshness and vibrancy to the presentation.
Sauce Pairing Suggestions
While our Las Vegas Roll is already dressed with spicy mayo, offering additional sauces on the side allows diners to customize their experience to their liking. Here are a few suggestions:
- Soy Sauce: A classic accompaniment to sushi, soy sauce is rich, salty, and complements the flavors of the fried roll. Opt for a low-sodium variety to keep the dish balanced.
- Eel Sauce: For a sweet and umami flavor, eel sauce is an excellent choice. Its thick consistency and sweet-savory flavor profile pair wonderfully with the crispy texture of the Las Vegas Roll.
- Wasabi and Pickled Ginger: Offering wasabi and pickled ginger on the side is traditional. The wasabi adds a powerful heat that can be adjusted to taste, while the pickled ginger serves as a palate cleanser between bites, refreshing the taste buds.
Conclusion
We’ve walked through the art of making the perfect Las Vegas Roll from the ground up. It’s not just about the ingredients but the care in preparation and presentation that transforms it into a culinary delight. Remember the joy is as much in the creating as it is in the tasting. So next time you’re looking to impress or just indulge in a bit of sushi-making fun don’t forget the tips and tricks we’ve shared. Whether it’s getting that rice seasoning just right or drizzling the final touches with your favorite sauces every step is an opportunity to make your Las Vegas Roll uniquely yours. Here’s to making your next sushi experience an unforgettable one!
Related Posts:
- Sunshine Roll Sushi Recipe: A Step-by-Step Guide to Fresh Flavors
- Crafting the Perfect Alaska Roll Sushi: Tips & Techniques
- Master American Dream Roll Sushi: Recipe & Plating Secrets Unveiled
- Ultimate Guide to Making Godzilla Roll Sushi: From Prep to Plate
- Mastering Passion Roll Sushi: Tips for Perfect Rolls Every Time
- Ultimate Guide to Black Dragon Roll Sushi: Ingredients & Serving Tips
- Ultimate Guide to Las Vegas Roll Sushi: Prep, Fry, and Serve Like a Pro
- Lemon Roll Sushi: A Citrus Twist on Traditional Favorites & Storage Tips
- Lobster Roll Sushi: A Fusion Delight with Easy Prep Tips